
Core Building Brick of Mac OS X and iOS
When Mac OS X Snow Leopard was released on August 8, 2009, I was amazed by its great offer: to give me back hard drive space, as I made a note in my mac blog. I got 11GB space back after I updated my OS X to Snow Leopard.
I was puzzled by this result. For sure, I guess that Apple must have done tremendous work to fine-tune its core OS engine in many ways such as rewriting its OS to optimize OS frameworks. WWDC10 reveals more information on how this was done. Apple has rewritten its compiler. The Snow Leopard was built on the new compiler LLVM, and iOS on its way from GCC to LLVM. With LLVM and Clang (compiler front end for C/C++ and Objective-C), Apple said that OS X was reduced in file size by 27%.
Compiler is the fundamental tool to convert source codes are converted into a binary language that a computer machine understands. Windows or Mac OS are built by compilers. No matter what languages we use, or whatever frameworks we have a in a language, eventually they will be compiled into machine language as packages. I think that Apple is right on the key point to restructure its compiler on assembly or machine codes. It is really hard work but all the effort has tremendous water ripple effect on Mac OS and Apple's future.
According to Apple's developer web site on What's New in XCode4, LLVM compiles codes twice quickly as GCC. The new compiler generates optimized machine codes tailored to today's modern chip architecture with a set of highly optimized libraries. As a result, the compiled applications run faster than GCC's as well.
That's why I call it as Mac OS' core building brick.
XCode4
Snow Leopard OS X has been in use for about one year. It has been approved as a solid and great OS. Now it is time for Apple to move on.
XCode 3 has been used as an IDE for developing Mac and iPhone applications. WWDC10 revealed a new beta XCode4 released for paid developers. Basically XCode4 is built based on LLVM and LLDB (as debuger). The compiler has a parser part to process source codes. XCode4 utilizes the parser to provide right and accurate information about source codes with the most advanced technology and architecture built in LLVM. As a result, XCode4 provides a much better development environment and tools for developers, than the current XCode3. For me, this is a great news. I just cannot wait for its release.
Other Foundations/Frameworks
WWDC10 reveals many other new foundations/frameworks for iOS. Most of those foundations/frameworks have been available in Mac OS since the Snow Leopard release. Those foundations/frameworks provide various ways to felicitate mobile application development, some of them with lower access to Apple's hardware, and some new ones are specially for iOS such as multitasking, iAd, GameKit, and more.
Many of new features in iOS are from Mac OS X or Snow Leopard. For example, blocks are very powerful feature in Mac OX and now available in iOS. It makes multitasking much easy to implement and many other foundations/frameworks with blocks are available as they are.
EventKit.framework provides interfaces to access calendar events on devices.
The Core Motion framework (CoreMotion.framework) provides a single set of interfaces for accessing all motion-based data available on a device. The framework supports accessing both raw and processed accelerometer data using a new set of block-based interfaces.
iAd. Framework provides simple interface APIs for developers to to deliver banner-based advertisements from their applications.
Graphics and Multimedia frameworks provides APIs in either Objective-C or C level APIs to access to graphics, video and audios devices.
GameKit provides multi-player capabilities to mobile game applications with peer to peer network connectivity, using a Bluetooth connection - no pairing required. In addition to that, it provides scores and achievement rewards to users.
iOS provides over 1500 new APIs and above are just a few of them. Refer to Apple web sites for more detail information such as What's New in iOS 4.0.
Thursday, July 29, 2010
Mac OS, iOS, XCode4 and Foundations/Frameworks
Saturday, July 17, 2010
MyLogger Class in Objective-C (4)

NSLog is a C function to print out messages. It is very useful, however, as it is a function, where parameters limit its usage. It possible to pass complicated parameters, however, that' may be too difficult or just impossible. In case if you want to define different storage or format for logging message, class is the way to go. That's my initial intension to define a wrapper class for NSLog: MyLogger.
MyLogger's logging engine still uses NSLog. You can easily extend it to other storage. The API provides methods to set intention and logging message with various levels.
Usage
Normally, I initialize MyLogger settings initially in main(), where you rarely make changes. This will keep all the logging messages in the same format and consistency style. The settings are default logging level, and optional indention char and format. The great advantage of strategy is that you can easily set logging level to none if you want to disable the logging feature and you would not need to remove codes from your projects all over the places.
Here is an example of MyLogger settings:
#import <UIKit/UIKit.h>
#import "MyLogger.h"

int main(int argc, char *argv[]) {

  NSAutoreleasePool * pool = [[NSAutoreleasePool alloc] init];
  // Setup the default settings for logger
  MyLogger.defaultLoggingLevel = LogLevelDebug;
  MyLogger.indentChar = '-';

  int retVal = UIApplicationMain(argc, argv, nil, nil);
  [pool release];
  return retVal;
}
Then you are ready to use
MyLogger in other places in your project. For me as a newbie of Objective-C developer, Cocoa framework and Objective-C are overwhelming to digest. It was very easy to get lost and frustrated. The way I used MyLogger is to place it in each method in my classes in a pair: logging at the first line of the method and logging at the exist point of the method, and set indent at the entry and outdent at the exit. I do get a lots debug messages; however, since all the messages are in a nice indention structured layout, it makes much easy to read and understand the flow of my class. That has been great help for me.Another practice I have is that for each class where I want to do logging, I define a private var
MyLogger* member. In the class constructor, I create the var and initialize it with a context name of that class. In this way, all the logging messages will have a clear context string to identify the messages. To set context in one place makes my logging much easy to maintain in case I need to rename my class as an example.Taking MyClass as example, here is the way I add logging feature to the class:
// .h file
#import <UIKit/UIKit.h>
@class MyLogger;
...

@interface MyViewController : UITableViewController
  <NSFetchedResultsControllerDelegate, UITableViewDelegate> {

  ...
  @private
    MyLogger* mLogger;
  ...
}
...
@end

// .m file
#import "MyLogger.h"
...
@implementation MyViewController
...
- (id)initWithStyle:(UITableViewStyle)style {
 if (self = [super initWithStyle:style]) {
   mLogger = [[MyLogger alloc] initWithContext:@"MyViewController"];
   [[mLogger debug:@"initWithStyle: %@", style == UITableViewStylePlain ? @"Plain" : @"Group"] indent:YES];
   ...
   [[mLogger indent:NO] debug:@"initWithStyle: Done"];
 }
 return self;
}

- (NSInteger)numberOfSectionsInTableView:(UITableView *)tableView {
  [[mLogger debug:@"numberOfSectionsInTableView:"] indent:YES];
  NSInteger count = [[self.fetchedResultsController sections] count];
  [[mLogger indent:NO] debug:@"numberOfSectionsInTableView: DONE"];
  return count;
}

- (NSFetchedResultsController*) fetchedResultsController {
  [[mLogger debug:@"fetchedResultsController"] indent:YES];
  if (mFetchedResultsController == nil) {
    ...
      [mLogger debug:@"created new NSFetchResultsConroller obj: %@"
        mFetchedResultsController];
    ...
  }
  [[mLogger indent:NO] debug:@"fetchedResultsController DONE"];
  return mFetchedResultsController;
}
...
@end
Here is a list of my loggging messages:
...
2010-07-09 16:05:28.203 ExpenseLog[2648:207] [DEBUG] MyViewController - initWithStyle: Plain
2010-07-09 16:05:28.209 ExpenseLog[2648:207] [DEBUG] MyViewController - initWithStyle: Done
2010-07-09 16:05:28.210 ExpenseLog[2648:207] [DEBUG] MyViewController - viewDidLoad
2010-07-09 16:05:28.211 ExpenseLog[2648:207] --[DEBUG] MyViewController - fetchedResultsController
2010-07-09 16:05:28.211 ExpenseLog[2648:207] ----[DEBUG] MyViewController - managedObjectContext
2010-07-09 16:05:28.212 ExpenseLog[2648:207] ------[DEBUG] MyViewController - creating new managedObjectContext
2010-07-09 16:05:28.212 ExpenseLog[2648:207] ----[DEBUG] MyViewController - managedObjectContext DONE
2010-07-09 16:05:28.212 ExpenseLog[2648:207] ----[DEBUG] MyViewController - managedObjectContext
2010-07-09 16:05:28.213 ExpenseLog[2648:207] ----[DEBUG] MyViewController - managedObjectContext DONE
2010-07-09 16:05:28.213 ExpenseLog[2648:207] ----[DEBUG] MyViewController - created NSFetchedResultsController obj: <NSFetchedResultsController: 0x8611340>
2010-07-09 16:05:28.214 ExpenseLog[2648:207] --[DEBUG] MyViewController - fetchedResultsController DONE
2010-07-09 16:05:28.215 ExpenseLog[2648:207] [DEBUG] MyViewController - viewDidLoad DONE
2010-07-09 16:05:28.215 ExpenseLog[2648:207] [DEBUG] MyViewController - numberOfSectionsInTableView:
2010-07-09 16:05:28.216 ExpenseLog[2648:207] --[DEBUG] MyViewController - fetchedResultsController
2010-07-09 16:05:28.216 ExpenseLog[2648:207] --[DEBUG] MyViewController - fetchedResultsController DONE
2010-07-09 16:05:28.216 ExpenseLog[2648:207] [DEBUG] MyViewController - numberOfSectionsInTableView: DONE
2010-07-09 16:05:28.218 ExpenseLog[2648:207] [DEBUG] MyViewController - numberOfSectionsInTableView:
2010-07-09 16:05:28.218 ExpenseLog[2648:207] --[DEBUG] MyViewController - fetchedResultsController
2010-07-09 16:05:28.219 ExpenseLog[2648:207] --[DEBUG] MyViewController - fetchedResultsController DONE
2010-07-09 16:05:28.219 ExpenseLog[2648:207] [DEBUG] MyViewController - numberOfSectionsInTableView: DONE
2010-07-09 16:05:28.219 ExpenseLog[2648:207] [DEBUG] MyViewController - tableView:numberOfRowsInSection:
2010-07-09 16:05:28.220 ExpenseLog[2648:207] --[DEBUG] MyViewController - fetchedResultsController
2010-07-09 16:05:28.220 ExpenseLog[2648:207] --[DEBUG] MyViewController - fetchedResultsController DONE
2010-07-09 16:05:28.220 ExpenseLog[2648:207] [DEBUG] MyViewController - tableView:numberOfRowsInSection: DONE
2010-07-09 16:05:28.221 ExpenseLog[2648:207] [DEBUG] MyViewController - tableView:cellForRowAtIndexPath:
2010-07-09 16:05:28.221 ExpenseLog[2648:207] --[DEBUG] MyViewController - fetchedResultsController
2010-07-09 16:05:28.222 ExpenseLog[2648:207] --[DEBUG] MyViewController - fetchedResultsController DONE
2010-07-09 16:05:28.223 ExpenseLog[2648:207] [DEBUG] MyViewController - tableView:cellForRowAtIndexPath: DONE
...
I think it is really worthwhile to spend some time design this helper class. The benefits I have been received are tremendous. It greatly helps me to understand Cocoa framework, saves me enormous amount of time, and keeps my mind sharp on the business logic I want to implement.
With new iOS available, I think this class can be further enhanced with block feature to improve the performance. For example, I could put all the messages into a block so that when a logging level is disabled, the block would not be evaluated or executed at all.
Reference
- My Logger Class in Objective-C (3)
- Source codes: MyLogger
- Code Licences: Apache 2.0
Saturday, July 10, 2010
MyLogger Class in Objective-C (3)
MyLogger Instance Methods
This snap-shot is a list of instance methods:

Here is the partial codes in .h:
- (MyLogger*) indent:(BOOL)indent;

- (BOOL) levelEnabled:(MyLoggerLevel) intentLevel;
- (BOOL) infoEnabled;
- (BOOL) debugEnabled;
- (BOOL) warningEnabled;
- (BOOL) errorEnabled;

- (MyLogger*) debug:(NSString*)messageFormat, ...;
- (MyLogger*) warning:(NSString*)messageFormat, ...;
- (MyLogger*) error:(NSString*)messageFormat, ...;
- (MyLogger*) info:(NSString*)messageFormat, ...;
I group them into 3 sections. The first one is
indent. The first group contains only one simple method. This method takes only flag as parameter: indent or outdent. The implementation is very simple: it sets the global static variable (int). This integer number is used to insert number indent chars.static int gIndent = 0; ... @implementation MyLogger { ... - (MyLogger*) indent:(BOOL)indent { if (indent) { gIndent += gIndentChars; } else if (gIndent >= gIndentChars) { gIndent -= gIndentChars; } return self; }
The implementation is straightforward. One thing I should mention is that I applied the Fluent Interface pattern in this class so that some methods can be chained together to simplify its usage. I enjoy this practice very much as you can see my examples. However, it is a very controversial issue in Objective-C. I posted a question to my SO. I got some experts insights.
The next group is to get logging level status. Method levelEnabled: is a generic method to check if an intend level (MyLoggerLevel enum type) is enabled or not, and others are convenient methods to check if info, debug, warning or error logging level is enabled or not.
- (BOOL) levelEnabled:(MyLoggerLevel) intentLevel {
  BOOL enabled = NO;
  if (isValidLevel(intentLevel)) {
    enabled = self.level <= intentLevel;
  }
  return enabled;
}

- (BOOL) infoEnabled {
  return [self levelEnabled:LogLevelInfo];
}
...
here only infoEnabled is there. Other three are in the similar way. One interesting and great feature of Objective-C is that it interoperates with C well. I defined a static C function
isValidLevel(...). Within the function, Objective-C types are recognized. This feature brings great power and speed into Objective-C. The main reason I mixed C function into MyLogger class is to define private methods. Objective-C class does not provide any way or directive for private methods. All the methods in a class are public. This simplifies the compile and run time performance, no need to verify function's accessibility. Static C function is a perfect candidate for defining private methods. You will see three C functions later.
The last group of methods provides APIs to log messages. Those methods use FI pattern and C functions, as well variable arguments. Here is the method of
info:, simple and straightforward again:- (MyLogger*) info:(NSString*)messageFormat, ... { if ([self infoEnabled]) { va_list args; /* Initializing arguments to store all values after messageFormat */ va_start(args, messageFormat); logAt(self, LogLevelInfo, messageFormat, args); va_end(args); } return self; }
var_start and va_end are C macros, and logAt(...) is my C function. In the beginning part of MyLogger.m, I have the following C functions:static NSString* nameOfLevel(MyLoggerLevel intentLevel) { NSString* name = kLogLevelNameUnknown; switch (intentLevel) { case LogLevelDebug: name = kLogLevelNameDebug; break; case LogLevelWarning: name = kLogLevelNameWarning; break; case LogLevelError: name = kLogLevelNameError; break; case LogLevelInfo: name = kLogLevelNameInfo; break; default: break; } return name; } static void logAt(MyLogger* logger, MyLoggerLevel intentLevel, NSString* messageFormat, va_list argList) { if ( [logger levelEnabled:intentLevel]) { NSString* s = [[NSString alloc] initWithFormat:messageFormat arguments:argList]; NSString* indent = [NSString stringWithRepeatedChar:MyLogger.indentChar times:gIndent]; NSLog(gFormat, indent, nameOfLevel(intentLevel), [logger context], s); [s release]; } } static BOOL isValidLevel(MyLoggerLevel intentLevel) { BOOL valid = NO; switch (intentLevel) { case LogLevelDebug: case LogLevelWarning: case LogLevelError: case LogLevelInfo: valid = YES; break; default: break; } return valid; }
This almost concludes my posts on MyLogger class. I'll wrap it up in my next post with its usages and complete codes for downloading.
Reference
Thursday, July 08, 2010
WWDC 2010 Videos
Those are really good talks on Cocoa, Objective-C and iOS or iPhone. Most of them provide detail information about its new features and framework. I think my past years learning on Cocoa and Objective-C, and recent hands-on iPhone development benefit me a lot. Without my past knowledge and experience, it is hard to understand those new videos. I think I am on the right track with Mac and iPhone development.
Recall back the initial days when I was doing iPhone coding, it was too much and overwhelming, since the framework and syntax are so different from .Net and other languages such as JavaScript, PowerShell and Ruby. However, I knew that all those were new for me and I should not bring my past experience in other framework as pre-adjudgement to influence my learning. I tried to not just copy and paste codes. Instead, I just typed all the codes so that I got first experience with the new framework. I think my efforts are worthwhile. Now I feel the power and beauty of this new framework.
For example, the ObjC syntax is very different .Net C# one. The methods are function like: methodName(type par1, ...); while in ObjC, it is methodAndDescriptionWithArg1: descriptionWithArg2:.... ObjC actually is more descriptive and easy to read.
Taking the following C# example:
class MyClass {
  ...
  private bool DoAction(string name,
                        bool condition1,
                        int flag)
  {...}
  ...
}
...
obj = new MyClass();
obj.DoAction("some name",
             true,
             2);
When you use the method with arguments in values, it is really hard to understand the meaning of each argument. You may rely on Visual Studio intelligent hints to get their means.
The similar codes in ObjC:
@interface MyClass : NSObject {
...}

- (BOOL) doActionWithName:(NSString*)name
                           condition1:(BOOL)value
                           andFlag:(int)flag;
@end
...
obj = [[MyClass alloc] init];
BOOL result = [obj doActionWithName:"some name"
                   condition1:YES
                   andFlag:2];
As you can see the ObjC syntax is more descriptive. Here are two slides in session - 138 API Design for Cocoa and Cocoa Touch, at WWDC10:


As in the comparison, you can see that Apple's OS framework and Objective-C was fundamentally a well structured and designed even back to 1981, unlike other languages just mimic C syntax.
Saturday, June 19, 2010
IBOutlet and Property in iPhone OS
The control variables in the view controller class are defined by IBOutlet key work as indicator so that in the Interface Builder you can link the visual controls to the field variables in the class. In many example codes, including Apple examples, I have seen that those class level variables are also linked to their corresponding properties. Variables can be private, protected or public, but property in Objective-C are public. In my projects, I have never have any usages to access or set those field variables through properties outside the class. Why the properties are defined? I have tried to not define properties, and my codes do working well. I am confused, what is the reason doing that?
I posted a question to SO. Soon I got an answer saying that this is a duplicated question. From the link to the duplicated question, I found the explanation from Apple's documentaion: Resource Programming Guide.
Actually, my question was not exactly a duplicated one, just similar topic. In my case, the field variable name is different from its related property name, because OS 2.0 allows it. This brings my question into a further interesting one. In short, in case of IBOutlet, property and xib loading, it is better to keep the variable name and property name the same. I tried several tests and I found some further in depth issues. Then I posted my finding and analysis as an answer to my SO question. I would not repeat the answer here again.
Detect Window Form Application Status
During the process to refactory codes to enhance/optimize SQL queries, I realized that clients wants the more recent data because they want to see any changes when the application is in running. There are many cases this kind of refreshing is actually not necessary. For example, when the window form is minimized, or the OS Windows is locked. In many cases, clients just left the application running after their work. Windows is locked, but the application had still been pulling data from the SQL server.
Then I proposed a optimized strategy to stop the data pulling when the UI is not available, either minimized or Widnows is locked. My suggestion was accepted.
Checking Application Status
To find out the Window from's status is very easy. This can be done by checking form's property WindowState. Here are the codes in a Timer's cycle event:
private void timer1_Tick(object sender, EventArgs e) {
  if (IsWindowFormActive()) {
    // set interval to max
    timer1.Interval = int.MaxValue;
    Cursor c = this.Cursor;
    this.Cursor = Cursors.WaitCursor;

    RefreshDataAndViews();

    this.Cursor = c;
    // save the last update timestamp to timer's tag
    timer1.Tag = DateTime.Now;
    // if the window is locked, min or inactive, OnPaint() will not be called.
    this.Invalidate();
  }
  else
  {
    timer1.Interval = int.MaxValue;
  }
}

private bool IsWindowFormActive() {
  bool bRet = ( !_windowIsLocked && this.WindowState !=
                FormWindowState.Minimized &&
                this.Visible && this.Enabled);
    return bRet;
}
When the Window Form's state is minimized, Windows is locked or the form is not visible, the timer's interval is set to the maximum number of integer. All the status checking is done within the method
IsWindowsActive.Find out If Windows is Locked
There is one class level variable
_windowsIsLocked as a flag for Windows lock status. To set this flag, an event is added within the form's CTOR:class MainForm {
private bool _windowsIsLocked;
...
// CTOR
public MainForm()
{
...
SystemEvents.SessionSwitch +=
new SessionSwitchEventHandler(SystemEvents_SessionSwitch);
...
}
...
void SystemEvents_SessionSwitch(object sender, SessionSwitchEventArgs e)
{
if (e.Reason == SessionSwitchReason.SessionLock)
{
_windowIsLocked = true;
}
else if (e.Reason == SessionSwitchReason.SessionUnlock)
{
// cause OnPaint event called where timer is reset
_windowIsLocked = false;
}
}
Enable Timer When Application Back to Normal Running Status
When the timer's interval is set to the maximum value of integer, how to bring the timer back to the required cycle interval, such as 2 minutes(120000 milliseconds)? The trick is to overwrite form's OnPaint method.
Make sure the base method is called first. This even is the most intensively called event. Whenever the form is activated, clicked, re-sized or moved, OnPaint will be called. Therefore, it is recommended to avoid any lengthy codes in this method. For my case, what I need to do is to reset the timer's interval if the application is back to normal:
protected override void OnPaint(PaintEventArgs e)
{
  try
  {
    base.OnPaint(e);
    int interval = NORMAL_REFRESH_INTERVAL;
    object timerTag = Timer1.Tag;
    // check if the tag was set?
    if (timerTag != null && timerTag.ToString().Length > 0)
    {
      DateTime dt = (DateTime)timerTag;
      long ticks = DateTime.Now.Ticks - dt.Ticks;
      TimeSpan ts = new TimeSpan(ticks);
      // Is this time interval since last refreshing too long?
      if (ts.TotalMilliseconds > 1.5 * (double)interval)
      {
        // secons to start the next timer cycle
        interval = QUICKREFRESH_INTERVAL_AFTERAWAKE;
      }
      // Reset the timer's interval
      Timer1.Interval = interval;
    }
  }
catch { }
}
There is a try and catch blocks and exceptions are ignored. I had several cases of crashes when
OnPaint was introduced. Since there are not critical codes there, I just ignore any exceptions from this event.
Sunday, June 13, 2010
MyLogger Class in Objective-C (2)
Stucture of MyLogger Class
The structure of MyLogger class contains class level methods and properties, and instance level methods and properties. The following sections will discuss them in detail.
Class Level Methods and Properties
There actually only one class level method: Initialize. I think this is the default class initializer when any reference to MyLogger class is called or set. In theory, this method is not need to be called explicitly. As Objectuser's suggested, this method just creates a template, as a static instance of MyLogger, with default property settings.
All the class level properties are used for customized settings in all MyLogger instances. For example, defaultLogginLevel is used as default logger level. It is set only once and all the instances of MyLogger have the same logger level. Therefore, you can set this once at the begging of an application so that debug level is enabled or disabled. Other settings are very straightforward, such as indentChar, numberOfIndentChars, and format.
For the property format, it may need further explanation. The format should contain four place holders to be filed: indent, log level, context, and message. The default format is:
"%@[%@] %@ - %@"
where the first one is for indention, second for log level name (DEBUG, WARNING, ERROR, or INFO), third for context and last for log message.

Here are some codes:
// Define a static instnace as sort of prototype
static MyLogger* gInstance;
static int gIndent = 0;
static NSString* gFormat = @"%@[%@] %@ - %@"; // indent[logLevel] context - message
static char gIndentChar = ' ';
static int gIndentChars = 2;
...

#pragma mark -
#pragma mark MyLogger class methods
+ (void) initialize {
  // here self is class level self refert to the class ie MyLogger, best practice.
  gInstance = [[self alloc] init];
  gInstance.level = LogLevelError;
}

+ (int)defaultLoggingLevel {
  return gInstance.level;
}

+ (void)setDefaultLoggingLevel:(MyLoggerLevel)defaultLevel {
  gInstance.level = defaultLevel;
}

+ (char) indentChar {
  return gIndentChar;
}

+ (void) setIndentChar:(char)aChar {
  gIndentChar = aChar;
}

+ (int) numberOfIndentChars {
  return gIndentChars;
}

+ (void) setNumberOfIndentChars:(int)numberOfChars {
  gIndentChars = numberOfChars;
}

+ (NSString*) format {
  return gFormat;
}

+ (void)setFormat:(NSString *)aFormat {
  [gFormat autorelease];
  gFormat = [aFormat retain];
}
Instance Level Properties and NSObject Methods
There are two instance level properties:
level and context. The level is corresponding to class property defaultLoggingLevel, but it provides flexibility for instance to set instance logging level. Those two properties are straightforward:
#pragma mark -
#pragma mark MyLogger properties
@synthesize level=mLevel;
@synthesize context = mContext;
I divide instance level methods into two groups:
NSObject methods and MyLogger instance level methods. The NSObject methods are override methods, such as init and description. The init methods in MyLogger are actually two customized CTORs(constructors).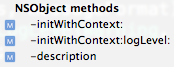
#pragma mark -
#pragma mark NSObject methods

- (id) initWithContext:(NSString*)loggingContext {
  if (self = [super init]) {
    self.level = gInstance.level;
    self.context = loggingContext;
  }

  return self;
}

- (id) initWithContext:(NSString*)loggingContext logLevel:(MyLoggerLevel)intentLoggingLevel {
  if (self = [self initWithContext:loggingContext]) {
    self.level = intentLoggingLevel;
  }

  return self;
}

- (NSString*) description {
  NSString* s = [[NSString alloc] initWithFormat:@"Mylogger instance - level: %@, context: %@",
     nameOfLevel(mLevel), mContext];
  [s autorelease];
  return s;
}
The
description method may not be required. It just occurred to me with crashing within MyLogger class once and the description provides me some help to identity MyLogger class with its internal private data member information.There is another one NSObject related method:
dealloc. I called it as memory management. It contains very simple codes:#pragma mark - #pragma mark Memory management -(void) dealloc { self.context = nil; [super dealloc]; }
My next blog will focuse on MyLogger instance methods.
Reference
Saturday, June 05, 2010
Reset Keyboard for an Entry Field (iPhone)
I have seem some applications have very nice feature to use iPhone keyboard's enter or next key switch an input to the next entry field if available. The issue I had is that bother fields in sequence have the same keyboard but with different mode, one in numeric and the next in alphabet, then the keyboard would not switch back to the required alphabet mode. Use is required to press ABC key to go back numeric mode if he/she needs.
The problem is caused by the setting of the field as responder within the event of textFieldShouldReturn:. The next field's textFieldDidBeginEditing: is called with the ...Return event. This nested call prevent the keyboard to change the default mode as required. Here is an example:
Input in Rate field. Press Next key to the Note field.
The keyboard says in the numeric mode.
I used my NSLog wrapper class to debug the sequence of calls and state messages.
[DEBUG] EditTaxViewController - textFieldDidBeginEditing
[DEBUG] EditTaxViewController - textFieldDidBeginEditing DONE
[DEBUG] EditTaxViewController - textFieldShouldReturn
--[DEBUG] EntryFieldHelper - findNextEntryFieldAsResponder:
----[DEBUG] EditTaxViewController - textViewDidBeginEditing
----[DEBUG] EditTaxViewController - textViewDidBeginEditing DONE
--[DEBUG] EntryFieldHelper - findNextEntryFieldAsResponder: return: true
[DEBUG] EditTaxViewController - textFieldShouldReturn DONE
As seem in the log, The
event textFieldDidBeginEditing: was fired with the event textFiledDidEntEditing. The keyboard mode is not changed, since the keyboard was not resigned yet. What I need is to find a way to fire the textFieldDidBeginEditing afterwards. I have tried some many different ways, finally, with the debug message help, I realized this point and I found iPhone Notification framework is the way to resolve the issue.I have created a helper class to encapsulate all the logic. Here is the way I use the helper class:
- (BOOL)textFieldShouldReturn:(UITextField *)textField
{
  [[mLogger debug:@"textFieldShouldReturn"] indent:YES];
  // No more inputs?
  if (![mEntryFieldHelper findNextEntryFieldAsResponder:textField])
  {
    ...
  }
  [[mLogger indent:NO] debug:@"textFieldShouldReturn DONE"];
  return YES;
}

- (void)viewDidLoad {
  [[mLogger debug:@"viewDidLoad"] indent:YES];
    [super viewDidLoad];
    ...
  // Get all entry fields
  if (!mEntryFieldHelper)
  {
    mEntryFieldHelper = [[EntryFieldHelper alloc] initWithView:self.view];
    [mEntryFieldHelper registerForKeyboardNotifications];
    // the first two fields (tax and rate) are OK, but the note
    // field's keyboard needs to be reset
    mEntryFieldHelper.inputFieldsWithKeyboardToBeReset =
      [NSArray arrayWithObjects: [NSNumber numberWithInt:3], nil];
  }

  [[mLogger indent:NO] debug:@"viewDidLoad DONE"];
}
...
// In .h file:
@class EntryFieldHelper;

@interface EditTaxViewController : UIViewController <UINavigationBarDelegate,
  UITextFieldDelegate, UITextViewDelegate>
{
  ...
  @private
    MyLogger* mLogger;
    EntryFieldHelper* mEntryFieldHelper;
}
In the
viewDidLoad event, the helper class instance is created with view, next register keyboard notifications and last set an array of integers for input fields which need reset keyboard.In the event of
textFieldShouldReturn:, the method of findNextEntryFieldAsResponder: is called to set the next responder. Within the helper class, all the logic auto-jump to next fields is implemented. The only requirement for the view class or parent is that all the input fields should have tag value set in sequence in xib file. As in this example, three fields in the view: name, rate and note.The header file defines the variables, properties and methods:
@class MyLogger;
@interface EntryFieldHelper : NSObject {
@private
  MyLogger* mLogger;
  NSArray* mEntryFields;
  NSArray* mInputFieldsWithKeyboardToBeReset;
}

@property (nonatomic, retain) NSArray* inputFieldsWithKeyboardToBeReset;

-(id) initWithView:(UIView*) aView;
-(BOOL) findNextEntryFieldAsResponder:(UIControl*)field;
@end
And here are implementations, first the
initialization and dealloc:import "EntryFieldHelper.h"
#import "MyLogger.h"
#define kInputFieldKey @"MyInputFields"
@implementation EntryFieldHelper
@synthesize inputFieldsWithKeyboardToBeReset = mInputFieldsWithKeyboardToBeReset;
-(id)initWithView:(UIView *)theView {
if (self = [super init]) {
mLogger = [[MyLogger alloc] initWithContext:@"EntryFieldHelper"];
[[mLogger debug:@"InitWithView:"] indent:YES];
NSMutableArray* entryFields = [[NSMutableArray alloc] init];
NSInteger tag = 1;
UIView* aView;
while (aView = [theView viewWithTag:tag] ) {
if (aView && [[aView class] isSubclassOfClass:[UIResponder class]]) {
[entryFields addObject:aView];
}
tag++;
}
mEntryFields = entryFields;
[mEntryFields retain];
[entryFields release];
[[mLogger indent:NO] debug:@"initWithView: DONE"];
}
return self;
}
-(void) dealloc {
[[mLogger debug:@"dealloc"] indent:YES];
// Remove the subscription of all notifications from the notification center.
[[NSNotificationCenter defaultCenter] removeObserver:self];
if ([mEntryFields retainCount] > 0) {
[mEntryFields release];
}
[mInputFieldsWithKeyboardToBeReset release];
[[mLogger indent:NO] debug:@"dealloc"];
[mLogger release];
[super dealloc];
}
@end
The class level
NSArray mEntryFields is populated based on the input view's UIResponder type controls. The following is the method of findNextEntryFieldAsResponder:. A text field or text view is an input. Within the method, the field next to the input is searched within mEntryFields. If the found one does not require reset keyboard, it will become the next responder; if keyboard reset is required, then an notification is created and registered.- (BOOL)findNextEntryFieldAsResponder:(UIControl *)field {
[[mLogger debug:@"findNextEntryFieldAsResponder:"] indent:YES];
BOOL retVal = NO;
for (UIView* aView in mEntryFields) {
// Find the entry field
if (aView.tag == (field.tag + 1)) {
NSNumber* tag = [NSNumber numberWithInt:aView.tag];
if ([self.inputFieldsWithKeyboardToBeReset containsObject:tag]) {
NSNotification* notification = [NSNotification notificationWithName:kInputFieldKey
object:aView];
[[NSNotificationQueue defaultQueue]
enqueueNotification:notification postingStyle:NSPostWhenIdle
coalesceMask:NSNotificationCoalescingOnName forModes:nil];
[[NSNotificationCenter defaultCenter] addObserver:self
selector:@selector(keyboardShowNotification:)
name:kInputFieldKey object:nil];
}
else {
[aView becomeFirstResponder];
}
retVal = YES;
break;
}
}
[[mLogger indent:NO] debug:@"findNextEntryFieldAsResponder: return: %@",
retVal ? @"true" : @"false"];
return retVal;
}
Last the async notification is received to this method:
- (void) keyboardShowNotification:(NSNotification*) notification {
  [[mLogger debug:@"keyboardShowNotification:"] indent:YES];

  UIResponder* responder = [notification object];
  if (responder) {
    [responder becomeFirstResponder];
  }
  // Notification received. Remove the notification.
  [[NSNotificationCenter defaultCenter] removeObserver:self name:kInputFieldKey object:nil];

  [[mLogger indent:NO] debug:@"keyboardShowNotification: DONE"];
}
As expected here is the snap-shot of screen from rate to note:

hand here is the log:
[DEBUG] EditTaxViewController - textFieldDidBeginEditing
[DEBUG] EditTaxViewController - textFieldDidBeginEditing DONE
[DEBUG] EditTaxViewController - textFieldShouldReturn
--[DEBUG] EntryFieldHelper - findNextEntryFieldAsResponder:
--[DEBUG] EntryFieldHelper - findNextEntryFieldAsResponder: return: true
[DEBUG] EditTaxViewController - textFieldShouldReturn DONE
[DEBUG] EntryFieldHelper - keyboardShowNotification:
--[DEBUG] EditTaxViewController - textViewDidBeginEditing
--[DEBUG] EditTaxViewController - textViewDidBeginEditing DONE
--[DEBUG] EntryFieldHelper - <UITextView: 0x3d09bd0; frame = (20 143; 287 77); text = 'Test'; clipsToBounds = YES; opaque = NO; autoresize = W; tag = 3; layer = <CALayer: 0x3d09db0>> is responder
[DEBUG] EntryFieldHelper - keyboardShowNotification: DONE
Saturday, May 29, 2010
Code Syntax Highlighting
The second issue is that I like change my code background color to black so that it is easy and comfortable for eyes. The white background color is too bright and contrast. It consumes more energy, I think, for the terminal as well. So I think it is time to make change to my code syntax highlighting HTML codes.
Fortunately, I found that VIM has an option for TOhtml command to convert to HTML with CSS classes. The command is very simple:
:let html_use_css=1The result of
TOhtml will be HTML with style css classes defined in header part and all the syntax highlight HTML codes are based on span with class.
The next step is that I have to update my style css classes in my blogger. Two groups of css classes I have to include in my blog header section. It is easy to do since Blogger provides Edit HTML in blog settings. The first group is css classes in my div section as a box for codes. Based on the previous div, I added additional divs with additional background color and text color settings:
...
color: #cccccc;
background-color: #000000;
...
The second group of css files are those generated by VIM in HTML header section. I think VIM use generic css class names for codes. For example, the following are some generated by TOhtml command for Objective-C code:
<style type="text/css">
<!--
.Comment { color: #80a0ff; }
.Statement { color: #fbf204; }
.Special { color: #fb8000; }
.Identifier { color: #40ffff; }
.Type { color: #60ff60; }
For C#, SQL or other languages, the syntax color scheme may be different, but the class names are almost the same. That's the advantage of css.
With above changes, now my codes are and will be in new syntax highlighted colors, and my blog will be much easy to read and maintain.
Sunday, May 23, 2010
MyLogger Class in Objective-C (1)
In Xcode, there is similar feature available. It is NSLog(), which is a Cocoa foundation function.

This function can be used to print out debug messages in the same way as Debug.Print() in .Net. However, NSLog() is only a C-like function, therefore, there is no other features you can alter the behaviour of its output, as far I know about it. Therefore, I need a wrapper class for NSLog().
I found a very nice blog by Objectuser: A Single Class Logger in Objective C. This is very close to what I want, except for indention. Based on the class, I created my logger class: MyLogger. Here is the header of the class:
#define kLogLevelDebug 1
#define kLogLevelWarning 2
#define kLogLevelError 3
#define kLogLevelInfo 4
#define kLogLevelNone 100

@interface MyLogger : NSObject {
  int mLevel;
  NSString* mContext;
}

@property (nonatomic, assign) int level;
@property (nonatomic, retain) NSString* context;

+ (char) indentChar;
+ (void) setIndentChar:(char)aChar;
+ (NSString*) format;
+ (void) setFormat:(NSString*)aFormat;
+ (int) defaultLoggingLevel;
+ (void) setDefaultLoggingLevel:(int)defaultLevel;

- (id) initWithContext:(NSString*)loggingContext;
- (id) initWithContext:(NSString*)loggingContext logLevel:(int)intentLoggingLevel;
- (BOOL) levelEnabled:(int) intentLevel;
- (BOOL) debugEnabled;
- (BOOL) warningEnabled;
- (BOOL) errorEnabled;
- (BOOL) infoEnabled;
- (MyLogger*) indent:(BOOL)indent;
- (MyLogger*) debug:(NSString*)messageFormat, ...;
- (MyLogger*) warning:(NSString*)messageFormat, ...;
- (MyLogger*) error:(NSString*)messageFormat, ...;
- (MyLogger*) info:(NSString*)messageFormat, ...;
@end
The header file describes all the class members, properties, and methods.
Usage
The main purpose of this class is for easy to use. Typically, you need to create an instance of MyLogger in a class's init(). Then the instance is ready to use. For example, here is a view controller class .h:
@class MyLogger;

@interface MyViewController : UITableViewController
  ...
  @private
    MyLogger* mLogger;
}
...
@end
Notice that the class level mLogger is a private variable. There is no reason for outside to access to this mLogger instance. The following is an exmaple how this mLogger is used in the .m class:
#import "MyViewController.h"
#import "MyLogger.h"
...
@implementation MyViewController
- (id)initWithNibName:(NSString *)nibNameOrNil bundle:(NSBundle *)nibBundleOrNil {
   if (self = [super initWithNibName:nibNameOrNil bundle:nibBundleOrNil]) {
     // create logger with class name as context
     logger = [[MyLogger alloc] initWithContext:@"MyViewController"];
     // log a message and then indent
     [[logger info:@"initWithNibName:bundle:"] indent:YES];
     ...
     [logger info:@"object: %@", obj];

     ...
     // off indent and print msg
     [[logger indent:NO] info:@"initWithNibName:bundle: DONE"];
   }
}
...
- (UITableViewCell *)tableView:(UITableView *)tableView cellForRowAtIndexPath:(NSIndexPath *)indexPath {
    [[mLogger debug:@"tableView:cellForRowAtIndexPath:"] indent:YES];
    [mLogger debug:@"indexPath: %@", indexPath];

    ...
    [[mLogger indent:NO] @"tableView:cellForRowAtIndexPath: DONE"];
}
...
- (void)dealloc {
  if ([logger retainCount] > 0 ) {
    [logger release];
  }
  ...
}
@end
I think it is very straightforward: creating logger in init and retain it, using it anywhere in the class, and releasing it at end of the class. I declare logger in the .m file to keep it as private data members in the class. Three is no need to let outside to access or set this instance.
Here is an example output:
[INFO] MyController - viewDidLoad
 --[INFO] MyViewController - fetchedResultsController
 ----[INFO] MyViewController - managedObjectContext
 ------[INFO] MyViewController - creating new managedObjectContext
 ----[INFO] MyViewController - managedObjectContext DONE
 ----[INFO] MyViewController - getFetchRequestWithEntity:inContext:inContext:
 ----[INFO] MyViewController - getFetchRequestWithEntity:inContext:inContext: DONE
 ----[INFO] MyViewController - managedObjectContext
 ----[INFO] MyViewController - managedObjectContext DONE
 --[INFO] MyViewController - fetchedResultsController DONE
 [INFO] MyViewController - viewDidLoad DONE
My next blog will discuss some key points in MyLogger class.
Reference
Tuesday, May 11, 2010
Customize Xcode like MSVS
Key Bindings
This blog provides very useful information about how to customize key bindings. The basic idea is to create a customized .dict file:
/Users/USERNAME/Library/KeyBindings/DefaultKeyBinding.dict
The content of this file is JSON like:
/* ~/Library/KeyBindings/DefaultKeyBinding.dict */
{
    "KEY1" = "ACTION1";  /* Bind KEY1 to ACTION1 */
    "KEY2" = "ACTION2";  /* Bind KEY2 to ACTION2 */
    ...
}
The blog list all the modification keys and actions.
This blog has a MSVC key bindings. I gave it a try, but I think I still like to use Xcode default kyes. I like VS smart list or code completion by Control+Space the most. In Mac, I found out that the default Xcode key is "Control+,", F5 or Option+esc. Mac Developer Tips >> Xcode code completion has detail description about this my favorite feature and more.
In the Xcode preference->Key Bindings, a list of actions and keys are defined there. I think the above default keys may fill the blanks when I create a new one as its instructions.
Copy and Paste
The basic copy and paste in Mac is very similar to Windows. For example, Command+C, X, and V for copy, cut and paste, and +Z for undo. I think Control+Y is for redo, but Command+Shift+Z is for redo(I think it make sense in Mac).
In Windows, you can select a text and drag it anywhere, or hold Control key to make a copy. In Mac, the copy is by holding Option key.
Selection Indent
This tip explains how to do selection indent and un-indent. The keys are Command+] or [ for block indent or un-indent.
Block Comment/Un-comment
To comment or uncomment a block of codes, use key Command+/. Repeat to uncomment. This tip (one out of 10) is from the tip by John Muchow.
Refactor
VS provides great set of Rectoring tools, renaming variable is a great one. Xcode also provide this feature. Select a variable and press Shift+Comman+J, a dialog window is displayed. Rename is in a selection on the top left. This article has detail description and picture to show what Refactor is.
Overall, all above pretty much codes most part of features and functions I have used in VS. Xcode is a very competitive development tool for Mac and iPhone application development. I think with my continuing exploring and efforts, I'll be able to find out more powerful features to increase my productivity.
Sunday, May 09, 2010
Ouch! iPhone Memory Management
In my codes, one of view controller uses core data as data source. In the header file, a fetchedResultController is defined:
{
// ...
NSFetchedResultsController *fetchedResultsController;
// ...
}
// ...
@property (nonatomic, retain) NSFetchedResultsController *fetchedResultsController;
// ...
@end
In my .m file, the implementation of my customized getter is like this:
// ...
- (NSFetchedResultsController *)fetchedResultsController {
if (fetchedResultsController != nil) {
return fetchedResultsController;
}
....
NSFetchedResultsController *aFetchedResultsController = [[NSFetchedResultsController alloc]
initWithFetchRequest:fetchRequest
managedObjectContext:managedObjectContext
sectionNameKeyPath:nil cacheName:@"Root"];
aFetchedResultsController.delegate = self;
fetchedResultsController = aFetchedResultsController;
// [fetchedResultsController retain]; I missed this line to contain the object
// ...
return fetchedResultsController;}
My intension to implement getter is for this view controller class to have its own fetched result controller with the class own managed context object and fetch request. However, I did not retain the controller. The result is unexpected with the alloc and init object.
Here is a simplified example:
self.instance = aInstance;
The first line is directly reference or pointer assignment. The result is that both variables are pointing to the same memory address, and both variables have the same reference count; while the second line actually calls to the setter property of instance, and the reference of right side variable is passed to the setter method. It will be up to the setter class to retain, copy or do assignment.
In my customized property getter, in order to retain my alloc and init object, there are two options. First option is to do the direct assignment and then to retain it so that object reference count is increased to 1. The second and simple option is call the setter to do it [self instance] = ... The synthetic property definition guards the "retain" feature.
I had spent almost one week of evenings and one week end time to figure the issue out. The exception I got was "EXC_BAD_ACCESS". The following is my NSLog message in the getter method with system crash messages:
2010-04-12 07:15:23.347 MyApplication[8030:207] ...
2010-04-12 07:15:23.348 MyApplication[8030:207] MyViewController->fetchedResultsController
Program received signal: "EXC_BAD_ACCESS".
The exception happened at the end of the property getter. Now I understand the meaning of "EXC_BAD_ACCESS", at least this is one of many cases. It does say what it means: access to the memory which was released and not accessible.
Actually, I found the clue when I tried to google the issue. When I read some answers about one StackOverflow question (http://stackoverflow.com/questions/327082/exc-bad-access-signal-received). I immediately realized it was memory issue and then realized the object I tried to return was actually released.
It is a really good lesson. iPhone development is new for me, and I really en joy it when I figure out something. This is a way to gain knowledge and to make progress. After I corrected my codes, my application was back to alive and the view was displayed!

 Posts
Posts

